How to Build a White-Label Client Platform Using a CRM Website Template
For digital agency owners and forward-thinking solopreneurs, the holy grail of recurring revenue is not just providing services, but providing the platform on which those services operate. Relying on third-party tools like HubSpot or Salesforce often means handing over your client relationships to another vendor. The solution? Building a self-hosted, branded environment using a comprehensive CRM website template.
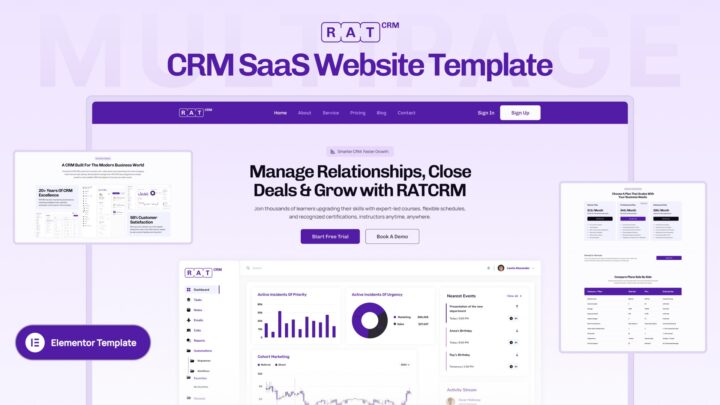
In this tutorial, we will walk through the technical implementation of RATCRM to build a fully functional, white-labeled system. By leveraging a high-quality CRM website template, you can bypass thousands of dollars in custom development costs and launch a proprietary WordPress management dashboard in a matter of hours, not months.
Why Use a CRM Website Template Instead of Custom Dev?
Building a Customer Relationship Management (CRM) system from scratch requires backend engineers, UI/UX designers, and ongoing security maintenance. A CRM website template, specifically one built for WordPress and integrated with RATCRM, bridges the gap between a standard Agency Website Template and a complex web application.
By utilizing a pre-configured SaaS Website Builder approach, you gain three distinct advantages:
- Speed to Market: deploy a Project Management Template structure immediately.
- Cost Efficiency: Eliminate the monthly per-user fees of enterprise SaaS.
- Total Brand Control: A White Label CRM Template allows you to present the software as your own proprietary technology.
Prerequisites
Before we begin this step-by-step guide, ensure you have the following:
- A fresh WordPress installation (version 6.0 or higher).
- The RATCRM plugin (Pro version recommended for full white-labeling).
- Elementor (Free or Pro) for utilizing the SaaS UI Elementor Kit.
- A reliable hosting environment (Cloudways or Kinsta recommended for SaaS performance).
Step 1: Establishing the Foundation with a WordPress SaaS Template
The first step in transforming a standard website into a web application is selecting the right theme architecture. While you could technically use any theme, a dedicated WordPress SaaS Template provides the clean, minimal canvas necessary for a dashboard environment.
When looking for the right CRM website template base, prioritize themes that support full-width page layouts and have stripped-back headers and footers. We aren’t building a blog; we are building a WordPress management dashboard.
Action Items:
- Install a lightweight theme like Hello Elementor or Astra.
- Disable default headers/footers to prepare for the Elementor Dashboard Template injection.
- Navigate to Settings > Permalinks and ensure ‘Post name’ is selected to ensure clean URL structures for your CRM endpoints.
Step 2: Installing and Configuring RATCRM Core
RATCRM is the engine that powers your CRM website template. Unlike standard plugins, RATCRM transforms the WordPress database structure to handle complex relationships between contacts, companies, and projects, effectively turning your site into a Custom CRM Template.
Installation Process:
- Upload the RATCRM zip file via Plugins > Add New.
- Activate the plugin and run the Setup Wizard.
- Crucial Step: In the settings menu, enable the ‘frontend-only’ mode. This prevents your clients from ever seeing the default WordPress backend, a critical feature for any Client Portal Template.
Once installed, RATCRM creates the necessary custom post types (CPTs) that your CRM website template will display. This includes ‘Leads’, ‘Customers’, ‘Invoices’, and ‘Tickets’.
Step 3: designing the Dashboard with a SaaS UI Elementor Kit
Now comes the visual transformation. A raw database is useless without a compelling interface. We will use Elementor to design the frontend, effectively creating a CRM Dashboard UI Kit that rivals venture-backed software.
To achieve a professional look, you shouldn’t just drag random widgets. You need to build a cohesive Elementor Dashboard Template.
Building the Sidebar Navigation
A true CRM website template relies on vertical navigation rather than the horizontal menu found on a SaaS Marketing Website.
- Open Elementor Theme Builder.
- Create a new ‘Single Page’ template.
- Create a two-column section: Set the left column width to 15% (Sidebar) and the right column to 85% (Content Area).
- In the left column, insert the RATCRM ‘Nav Menu’ widget. Style the links to look like a native app—active states should have a subtle background variation (e.g., #f4f6f8) to mimic a high-end SaaS UI Elementor Kit.
Creating the Data Overview
In the right column, we will build the data visualization. A high-converting CRM website template always gives the user a snapshot of their business health immediately.
- Stat Cards: Use inner sections to create a row of 4 columns. Insert the RATCRM ‘Dynamic Counter’ widget. Link these to the count of ‘Open Leads’, ‘Active Projects’, and ‘Unpaid Invoices’.
- Data Tables: Below the stats, drag in the ‘Entity List’ widget. This acts as the heart of your Project Management Template views. configure the query to show the 5 most recent updated items.
Pro Tip: Use box shadows (0px 10px 30px rgba(0,0,0,0.05)) on your sections to create that floating, modern card aesthetic typical of a premium Digital Agency Website Template.
Step 4: Configuring the Client Portal Template
For agencies, the ability to let clients log in and view their project status is invaluable. RATCRM includes a built-in Client Portal Template logic, but we need to style it.
Setting Permissions:
Go to RATCRM > Settings > Roles. Create a new role called ‘Client’. Ensure this role has ‘Read-Only’ access to ‘Projects’ and ‘Read/Write’ access to ‘Tickets’. This ensures your CRM website template functions securely.
The Client Dashboard:
Duplicate your main Elementor Dashboard Template and rename it ‘Client Dashboard’. Remove sensitive financial widgets. Replace them with a ‘Project Progress’ widget and a ‘File Upload’ widget. This simple switch turns a generic interface into a highly specific Agency Website Template module for client collaboration.
Step 5: Front-End Sales with a SaaS Landing Page Template
You have built the tool; now you must sell it. Whether you are selling access to the CRM or bundling it with your services, your public-facing site must look the part. You need a high-converting SaaS Landing Page Template.
Your marketing homepage should be separate from the app login, but visually consistent. When building your SaaS Marketing Website:
- Hero Section: Display a screenshot of the CRM Dashboard UI Kit you just built. Showing the actual interface builds trust.
- Feature Grid: Highlight specific modules like ‘Automated Reporting’ or ‘Lead Tracking’. Use icons consistent with your SaaS UI Elementor Kit.
- Pricing Tables: If you are reselling this as a White Label CRM Template solution, clearly outline the tiers (e.g., Solo vs. Agency).
Ensure your SaaS Landing Page Template includes a direct ‘Login’ button in the navbar that redirects to the custom login page we are about to configure.
Step 6: White-Labeling and Branding
The final step in perfecting your CRM website template is removing the traces of WordPress and RATCRM. This transforms the tool into your brand’s proprietary asset.
Custom Login Page
Never use the default wp-login.php. It breaks the immersion of a SaaS Website Builder experience. Use Elementor to create a canvas page containing the RATCRM ‘Login Form’ widget. Split the screen 50/50: Place a high-quality lifestyle image or brand pattern on the left, and the clean login form on the right. This is a standard pattern in any modern App Dashboard Template.
Branding the Backend
Navigate to RATCRM > White Label.
- Logo Replacement: Upload your agency logo. This will replace the RATCRM logo in the top corner of the CRM website template.
- Color Mapping: Input your brand’s hex codes. RATCRM will automatically inject these colors into the buttons, links, and active states of the WordPress Management Dashboard.
- Footer Credit: Remove “Powered by RATCRM” and replace it with “Powered by [Your Agency Name] Technology”.
Advanced Customization: Adding Project Management Capabilities
To truly maximize the value of your CRM website template, you should extend it beyond simple contact storage. By enabling the ‘Projects’ and ‘Tasks’ modules within RATCRM, you effectively create a robust Project Management Template.
Implementation:
Create a custom field group for ‘Projects’ that includes ‘Start Date’, ‘End Date’, and ‘Budget’. On the frontend Elementor Dashboard Template, use the ‘Repeater’ widget to display tasks associated with specific projects. This relational data display is what separates a basic website from a true Custom CRM Template.
Monetizing Your New Platform
By following this guide, you have successfully transformed a WordPress installation into a powerful business engine using RATCRM and a CRM website template strategy. You no longer just have a website; you have a SaaS Website Builder foundation that allows you to clone this setup for various clients or vertical markets.
Whether you use this as a Digital Agency Website Template to manage your own clients, or resell it as a White Label CRM Template to other businesses, the technical barrier to entry has been shattered. The combination of Elementor’s design flexibility and RATCRM’s data handling provides the ultimate toolkit for the modern digital entrepreneur.
Start building your CRM website template today, and stop renting your infrastructure from the giants.
Share This Post
Subscribe To Our Newsletter
Get More Update and Stay Connected with Us
Recent Posts